How to Host a Dynamic Website on AWS EC2 (What Steps I Follow)
AWS EC2 provides you with virtual servers in the cloud and allows you to run your website, databases, and other services. Therefore, hosting a dynamic website on AWS EC2 is a great choice if you’re looking for a scalable and reliable hosting solution.
This article is a complete guide on how to host a dynamic LAMP stack website on AWS EC2. So, without further ado, let’s dive into the nitty-gritty details.
How Can I Host My Dynamic Website on AWS?
AWS services that let you host a dynamic website are Amazon S3, Amazon EC2, and Amazon RDS. While S3 handles your files and folders, EC2 sees through the computing side of things. Here’s how you can use them both to host your website.
Step 1: Create S3 Bucket
An S3 bucket is required to keep all the files and folders associated with your dynamic website. Here’s how you can create an S3 bucket.
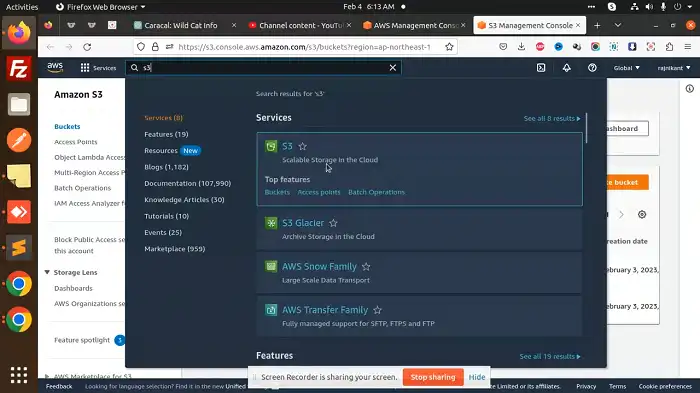
Launch the Amazon Management Console and select Services from the navigation menu. From Storage, choose S3 to open the S3 dashboard.
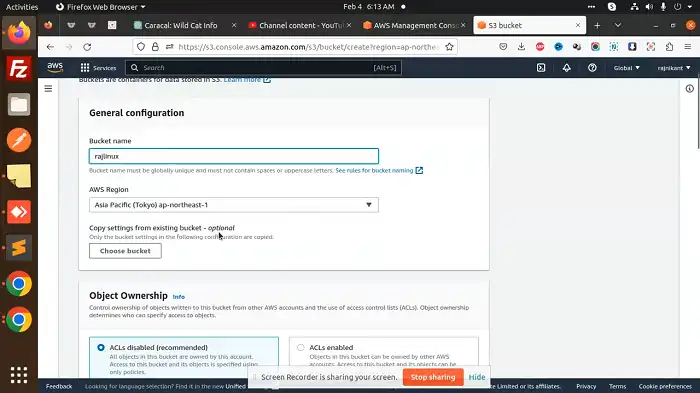
Select Create Bucket and assign a name to your bucket. Also, pick the AWS region you prefer.
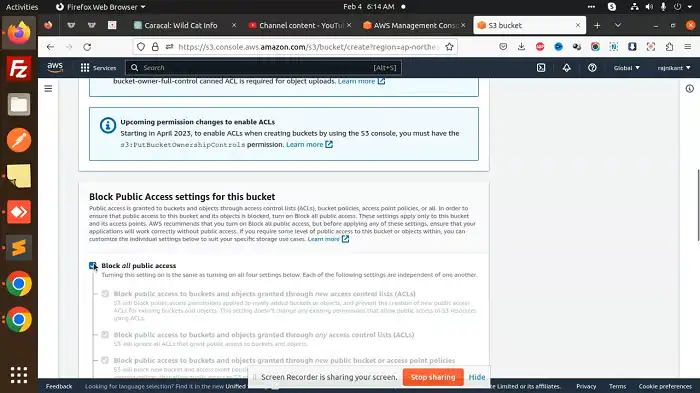
Check the box next to Block all public access so that your S3 bucket is inaccessible to unauthorized users.
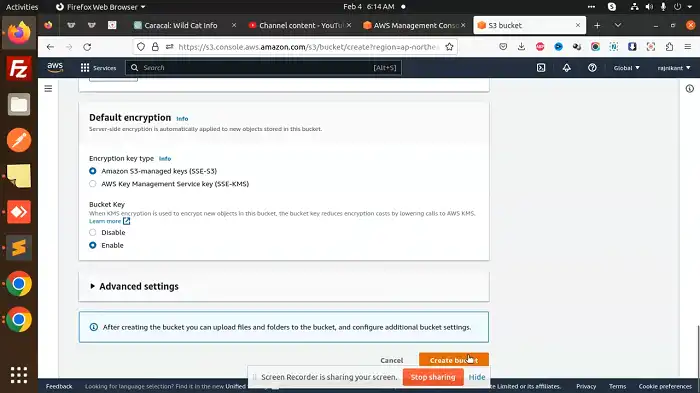
For the Bucket Visioning option, choose Disable. Enable the Server-side encryption and select Amazon S3 key (SSE-S3) as the Encryption Key type.
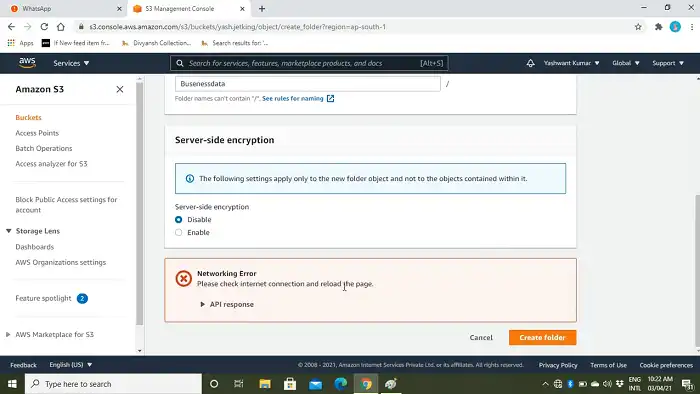
Finish by clicking on Create bucket.
Step 2: Upload Files to S3 Bucket
Once you have created your S3 bucket, it is time to upload files and folders associated with your website.
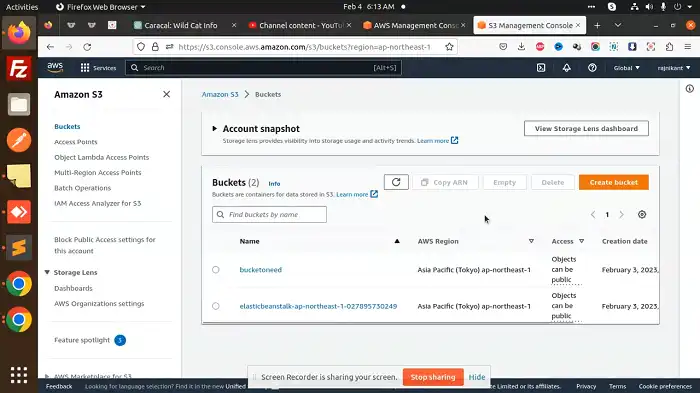
1. Go to your S3 dashboard and select the target bucket.
2. Click on Upload, then Add files, and browse through your files to select the necessary ones.
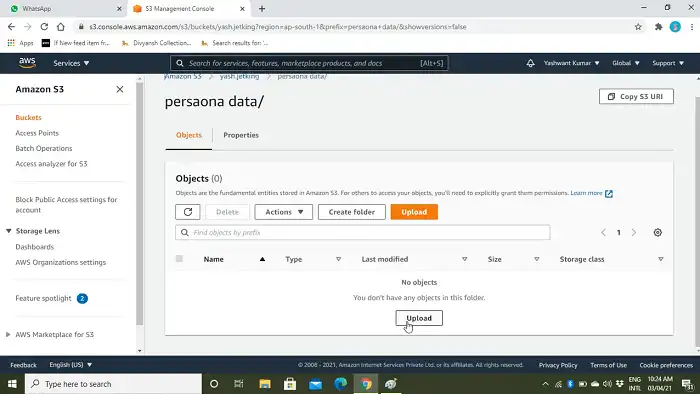
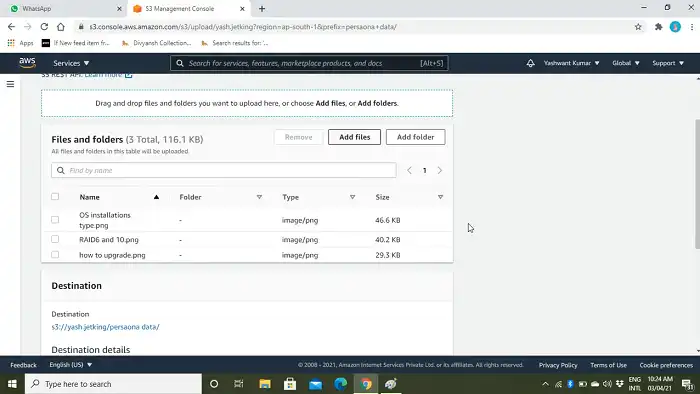
3. Next, click Upload.
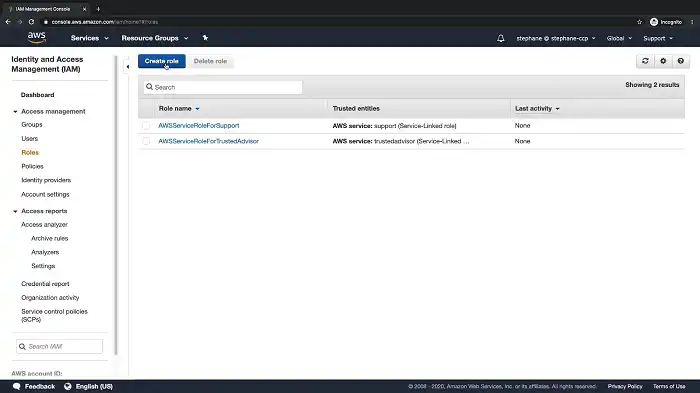
Step 3: Create an IAM Role
Creating an IAM role is necessary for granting EC2 access to S3. Follow the steps below to create an IAM role.
1. Head over to your IAM dashboard and select Roles. Next, choose Create Role > EC2 and click Next.
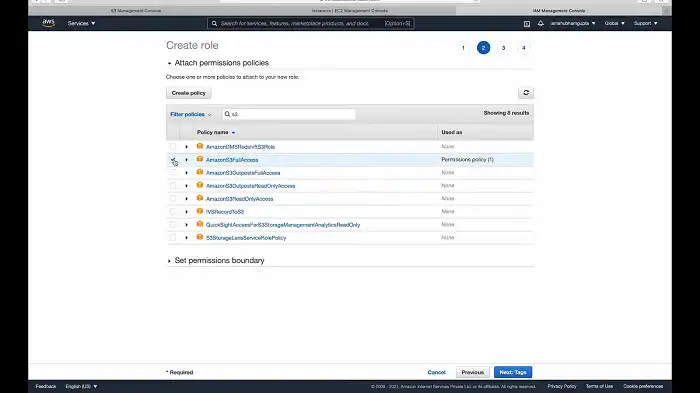
2. Type S3 in the search panel and check the box next to AmazonS3FullAccess. Choose Next to proceed. You can add tags if you want, although it is not mandatory.
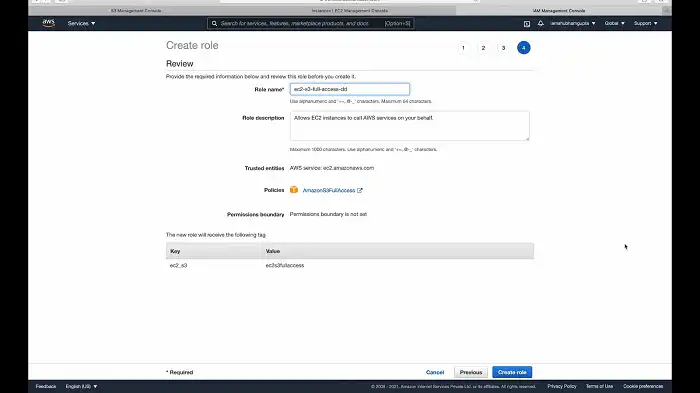
3. Click Next again and enter the name and description. Click on Create Role to finish the process.
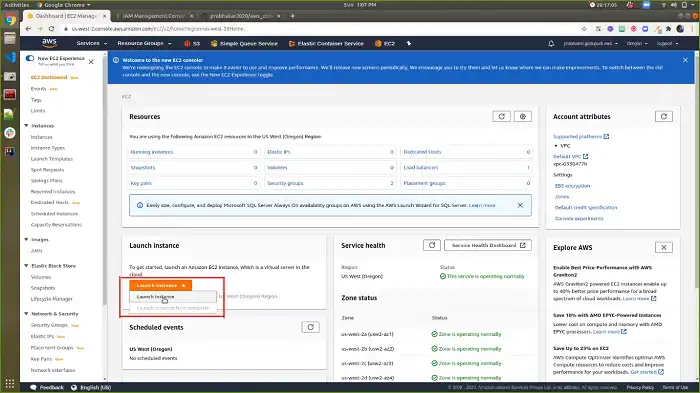
Step 4: Create an EC2 Instance
Open your EC2 dashboard and click Launch Instance.
From the dropdown menu, select Quick Start and click Select for Amazon Linux.
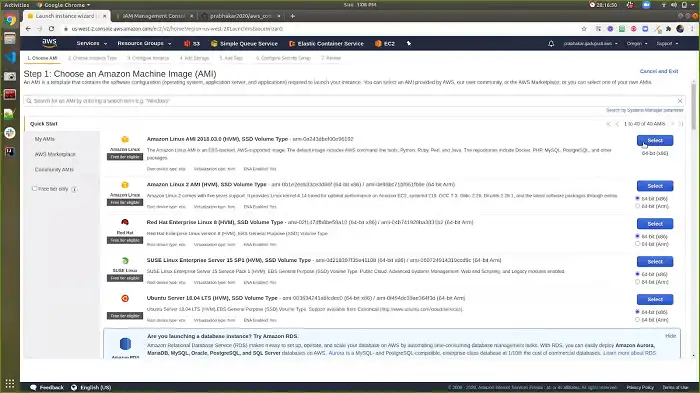
Pick t2.micro as the instance type and click Next: Configure Instance Details. For this example, we shall create one new instance.
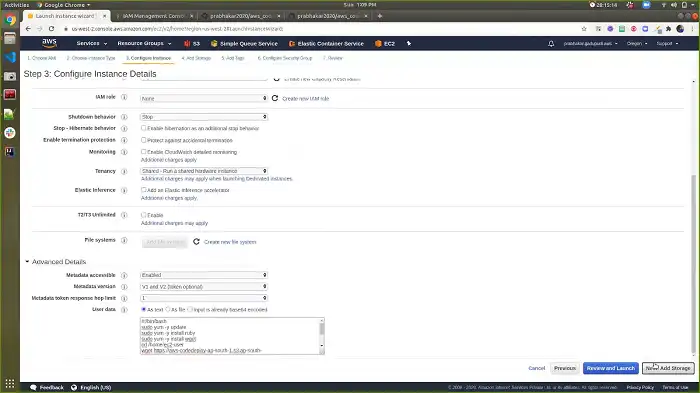
Select Default VPC for Network and choose the Subnet according to your preferred region.
Select the IAM role you created and choose Terminate as the Shutdown behavior. Go to Next: Add Storage, and determine the required storage. After that, add a tag by specifying its name and value.
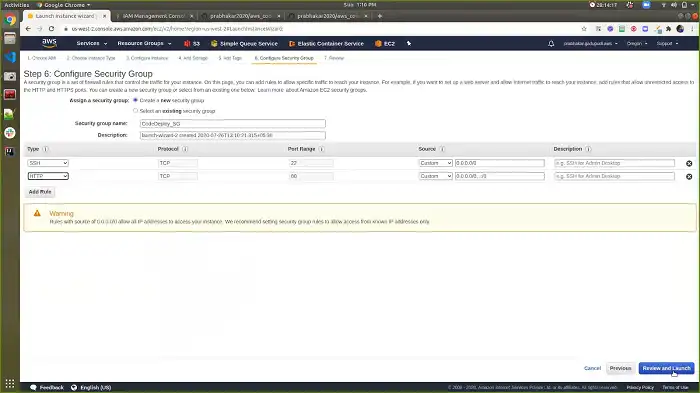
Then, click Next: Configure Security Group and choose the Create a new security group option. Specify a name and add a description before you select My IP as the Source.
After that, select Add Rule and set its type as HTTP while keeping the Source set to Anywhere. Add another rule with HTTPS as the type and the same Source. Now, choose Review and Launch > Launch.
Choose the option Create a new key pair and set the type to RSA. Assign it the name WebServerKey and then proceed to download the key pair.
Note that you’ll need to download this key in order to establish an SSH connection to your EC2 instance. Finally, select Launch Instances.
Step 5: Connect to EC2 Using MobaXterm
1. Copy the IP address of the EC2 instance you just created.
2. Open MobaXterm and click on Session > SSH. Paste the IP address you copied and specify the username.
3. Go to Advanced SSH settings, mark the checkbox next to Use private key, and add the path to the private key. Hit OK.
Step 6: Install a LAMP Web Server
1. Install Apache, MariaDB, and PHP using the following commands.
sudo amazon-linux-extras install -y lamp-mariadb10.2-php7.2 php7.2
sudo yum install -y httpd mariadb-server
2. Run the command below to launch and configure Apache.
sudo systemctl start httpd
sudo systemctl enable httpd
Now, copy your website content from your S3 bucket to EC2.
sudo aws s3 cp s3://dynamicwebappsm –region us-east-1 /var/www/html/ –recursive
Use the actual name of your S3 bucket.
3. Copy the public IPv4 address of your EC2 instance and paste it in a new browser tab to see if the hosting is successful. If the landing page of your website arrives, it means you’ve successfully hosted your dynamic website on AWS EC2.
People Also Asked For
Which AWS service is used to host dynamic websites?
EC2 is the AWS service most commonly used to host dynamic websites. Other options include Lightsail, a VPS (virtual private server) that lets you do the same.
Is it free to host a website in AWS?
Hosting a website in AWS is only $0.50 per month as long as you stay within the AWS Free Tier limits. Beyond that, the monthly cost can be around $1-$3.
Conclusion
There you have it! We tried to provide a complete walkthrough on how to host your dynamic website on AWS EC2. If you found this useful, please comment below and share this article with someone who might need it. Thanks for reading!
![[Answered] Does Stopped EC2 Instance Cost Money?](https://www.iheavy.com/wp-content/uploads/2023/09/Does-Stopped-EC2-Instance-Cost-Money-768x432.webp)