How to Deploy Django Project on AWS EC2 | A Complete Guide
Generally, Django includes a built-in development server for local project testing. However, if you want to m ake your application accessible globally, you will need a hosting solution from a cloud platform.
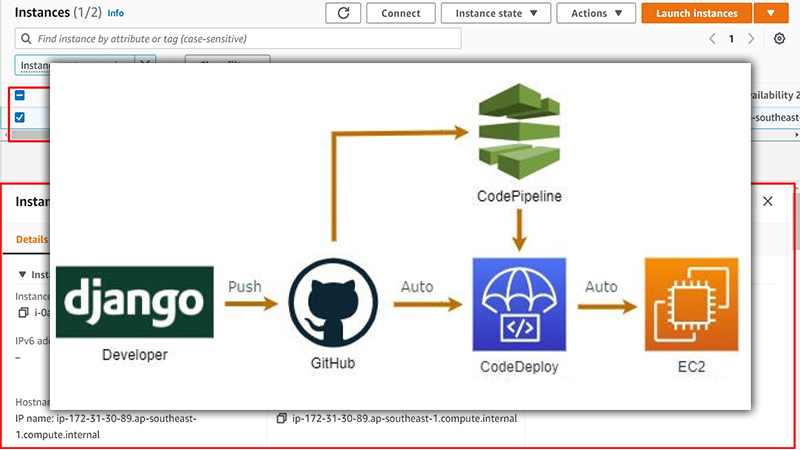
And AWS EC2 turns out to be a popular option to do just that. This article provides a comprehensive, step-by-step guide on how to deploy your Django project on AWS EC2. So, without further ado, let’s get to work.
3 Steps to Deploy Django Project on AWS EC2
Deploying your Django project on AWS EC2 is pretty straightforward. But for a proper deployment, you must set the inbound rules and change the port address. So, follow the steps till the end so you don’t miss out on the crucial part.
Setup Your AWS Account and EC2 Instance
If you don’t have an AWS account, go to the AWS Console website and create your account. After that, continue with the steps below to launch an ec2 instance with your operating system of choice.
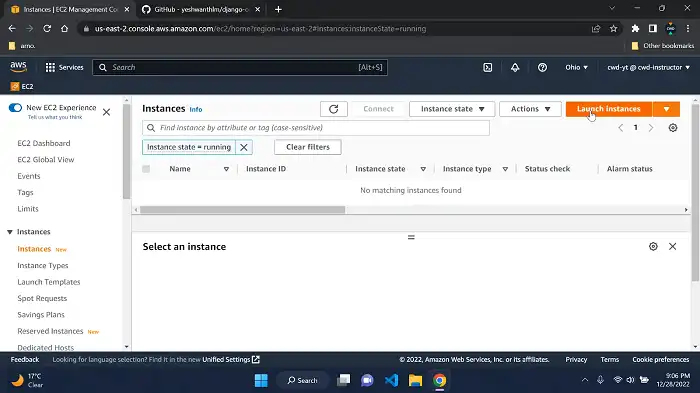
Step 1: Open the AWS console, and from your ec2 dashboard, click Instances (running). If you don’t have any running instances, go ahead and click Launch instances.
Assign a name and pick your preferred AMI. For this example, we shall be selecting Ubuntu. But you can choose any of them according to your preferences.
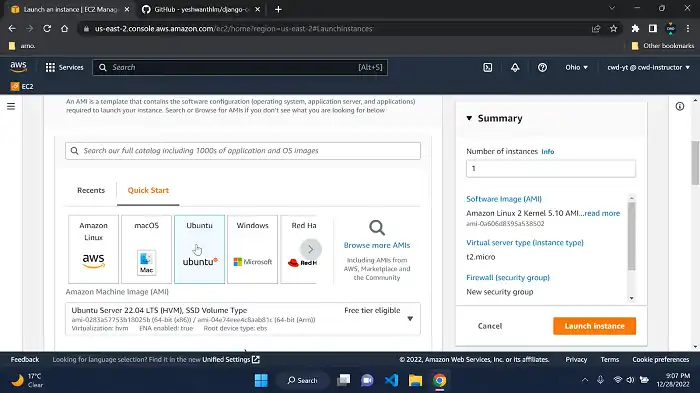
Check if the selected instance type is correct and proceed to the next step.
Step 2: Configure and initialize your instance by creating a new key pair or selecting an older one. It will help you access the instance afterward. However, you can skip it if you do not want to generate a key pair.
Under the Network settings tab, choose the Create security group option and check the box next to Allow SSH traffic.
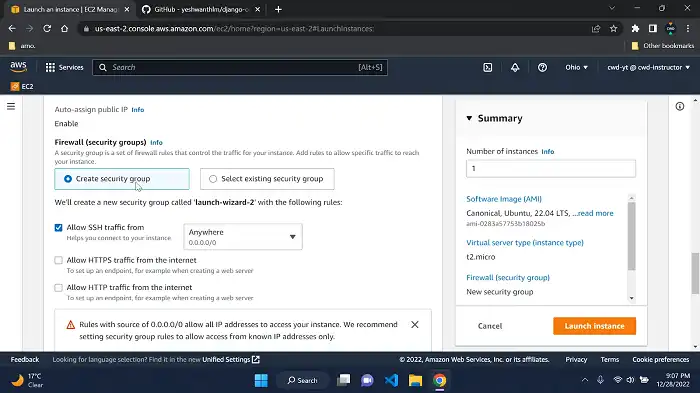
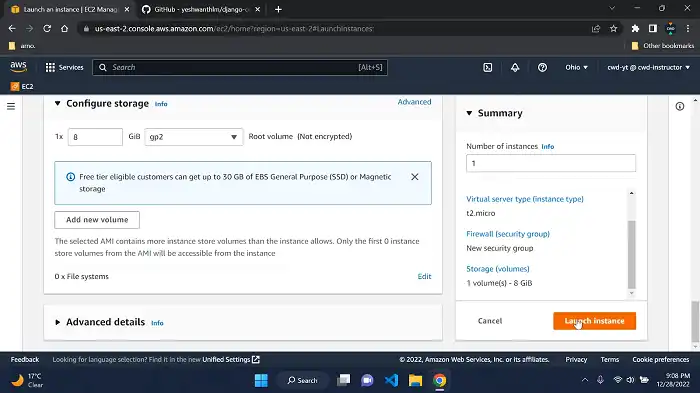
Configure storage as per requirements. Finally, review the settings and select Launch instance.
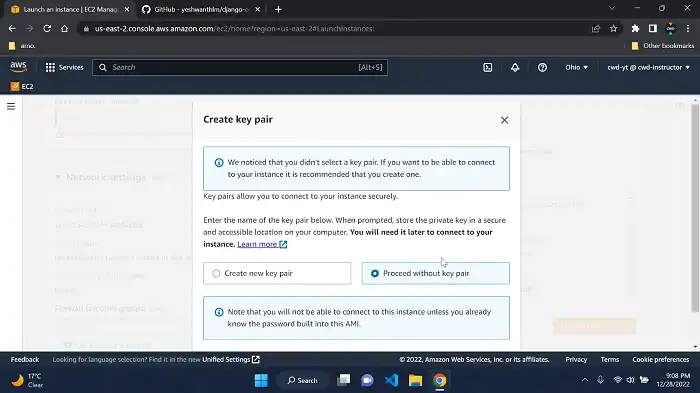
If you haven’t entered a key pair, choose Proceed without key pair when prompted.
Go to running instances and wait for a minute or two for the Instance state to change into Running. Also, make sure it has passed the status check.
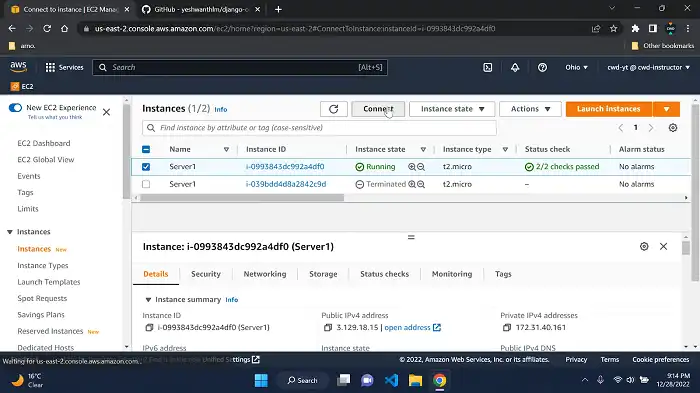
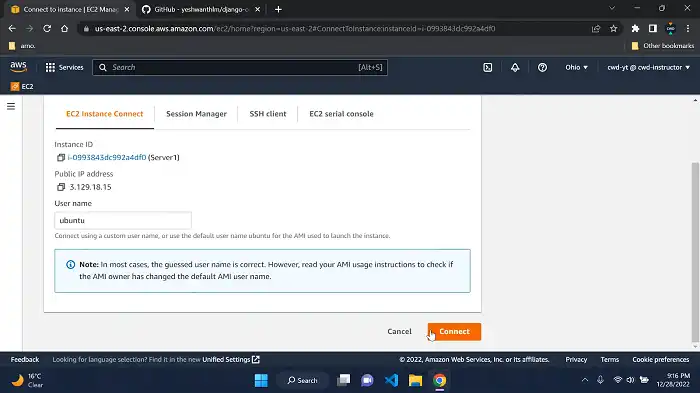
Step 3: Select the instance you just created and click on Connect. We shall use EC2 Instance Connect instead of SSH here.
Deploy Your Django Project on AWS EC2
Step 1: Once redirected to the command line interface, run the following command.
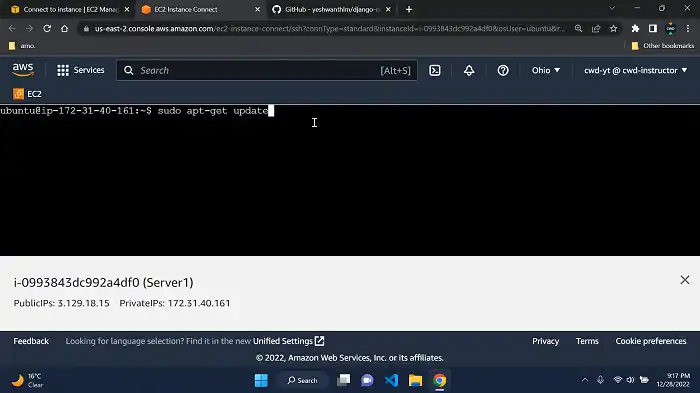
This will update and make the instance ready for deploying your project.
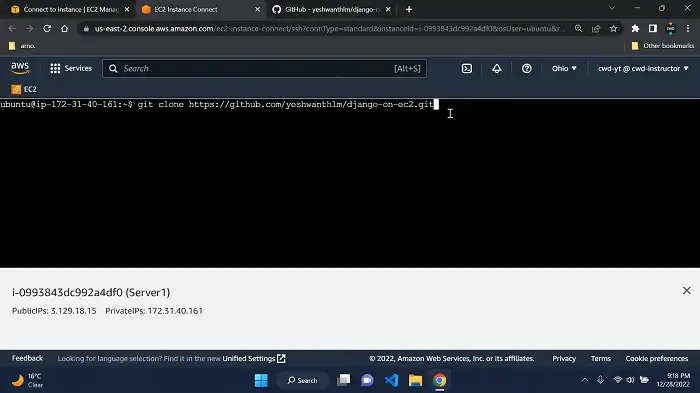
Step 2: Clone your Django project from your GitHub repository using the following command.
Use ‘cd django-project-folder’ to change the directory and go to your project folder. Replace the project folder name with the correct name of your directory.
Step 3: Install pip and Django using the commands ‘sudo apt install python3-pip -y’ and ‘pip install Django’.
Step 4: After downloading Django, go to the cloned repo directory and use the following command to create all the migration files required to run your project.
python3 manage.py makemigrationsNext, use the ‘python3 manage.py migrate’ command to apply the migrations.
Step 5: Create an admin user to run the project. Run the command below and provide username, password, and email.
python3 manage.py createsuperuserNow, you only have to start the server and your project will be ready to use. The command for starting the server is:
python3 manage.py runserver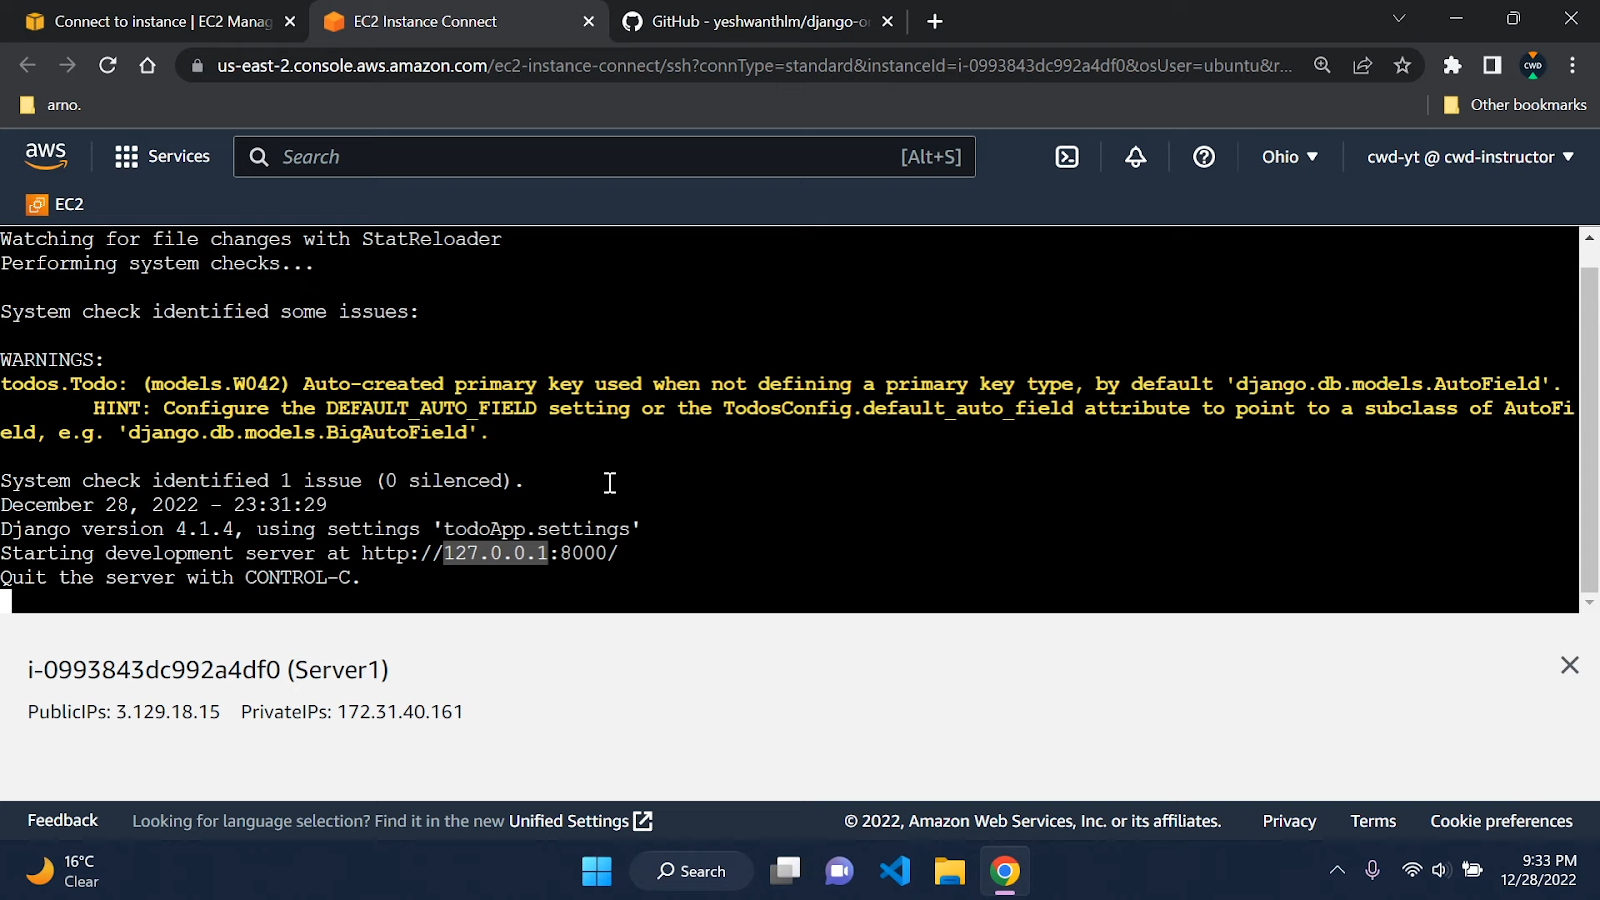
Run the Project on Port 8000
Up until this point, the project is deployed to our ec2 instance, but we usually want our app to run on port 8000 instead of a local host. Here’s what we need to do.
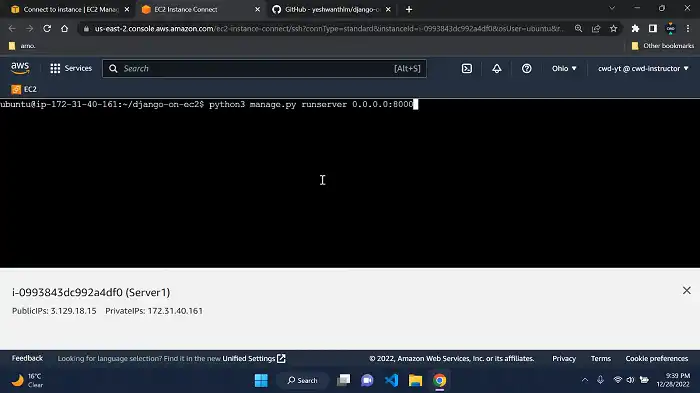
Step 1: Modify the command that starts the server by adding the port address at the end. It should look like this:
python3 manage.py runserver 0.0.0.0:8000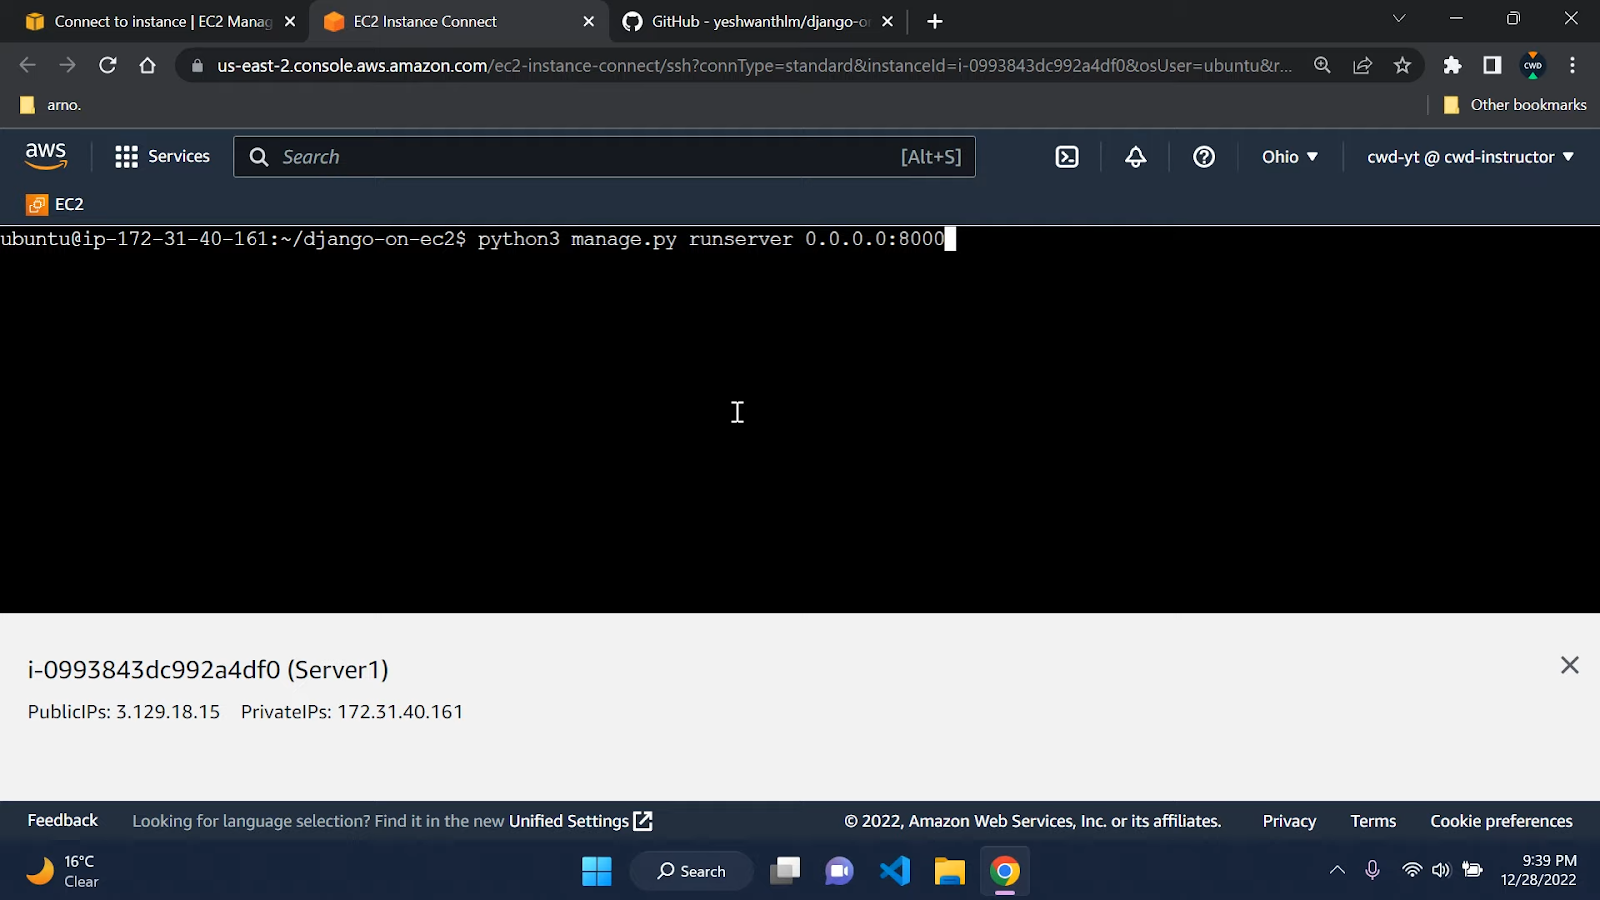
Step 2: To ensure the server continues to operate after closing the command-line shell, you’ll want to run it in the background within a separate screen session. First, install the ‘screen’ utility if you haven’t already with:
sudo apt install screenStart a new screen session using ‘screen’. Once inside the screen session, you can now launch your Django server in the background. Use the command:
python3 manage.py runserver 0.0.0.0:8000To detach from the screen session and leave the server running in the background, press Ctrl + A followed by D.
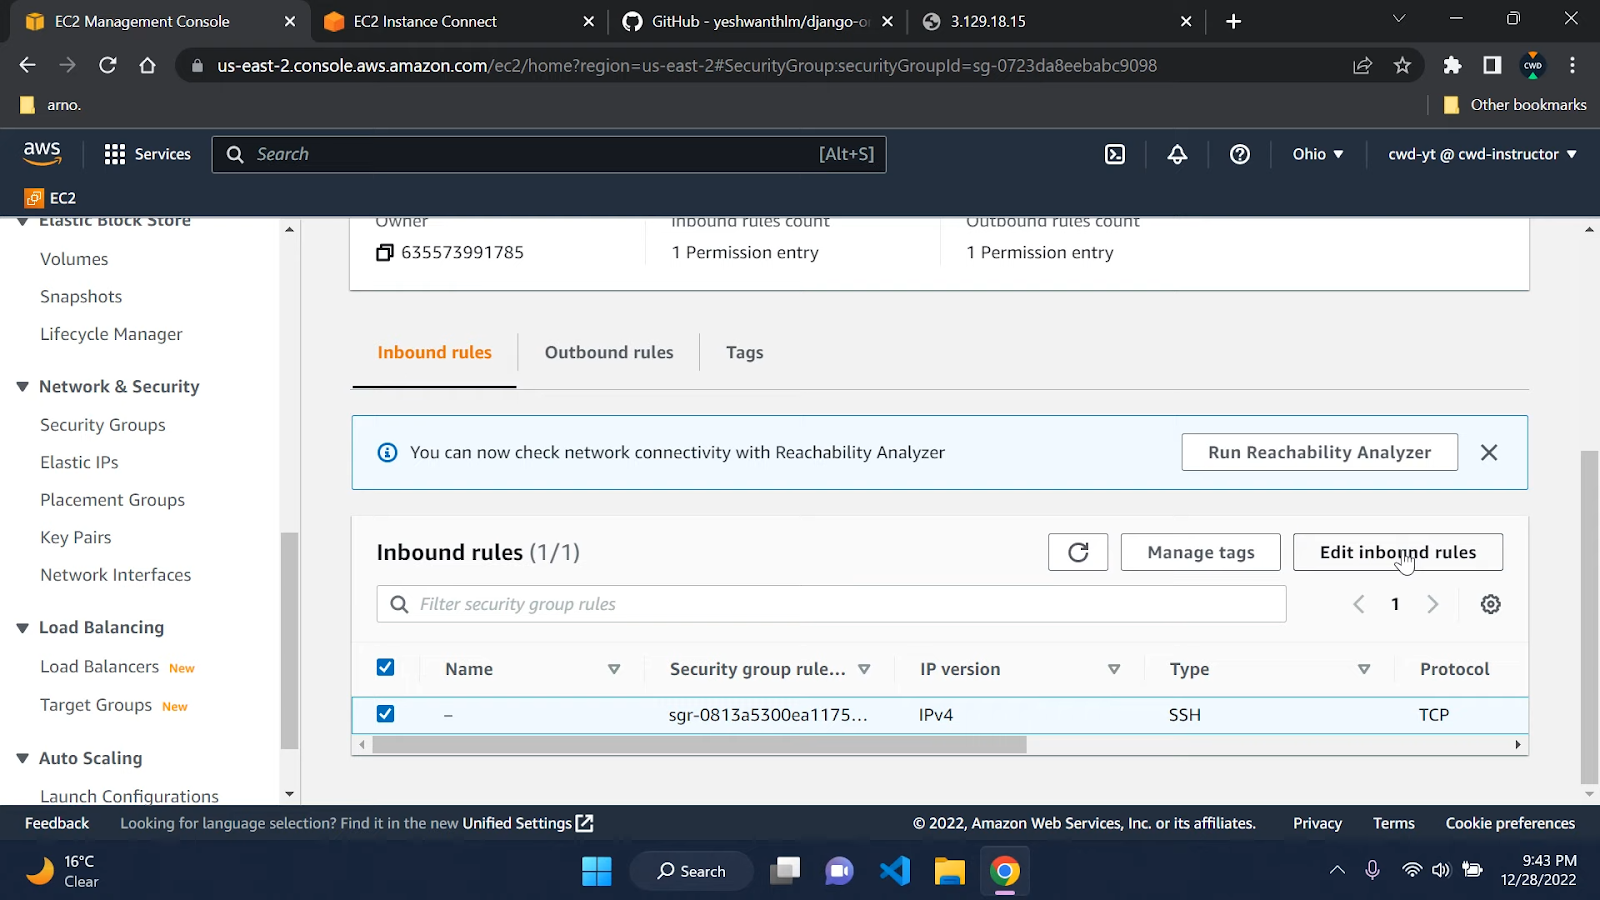
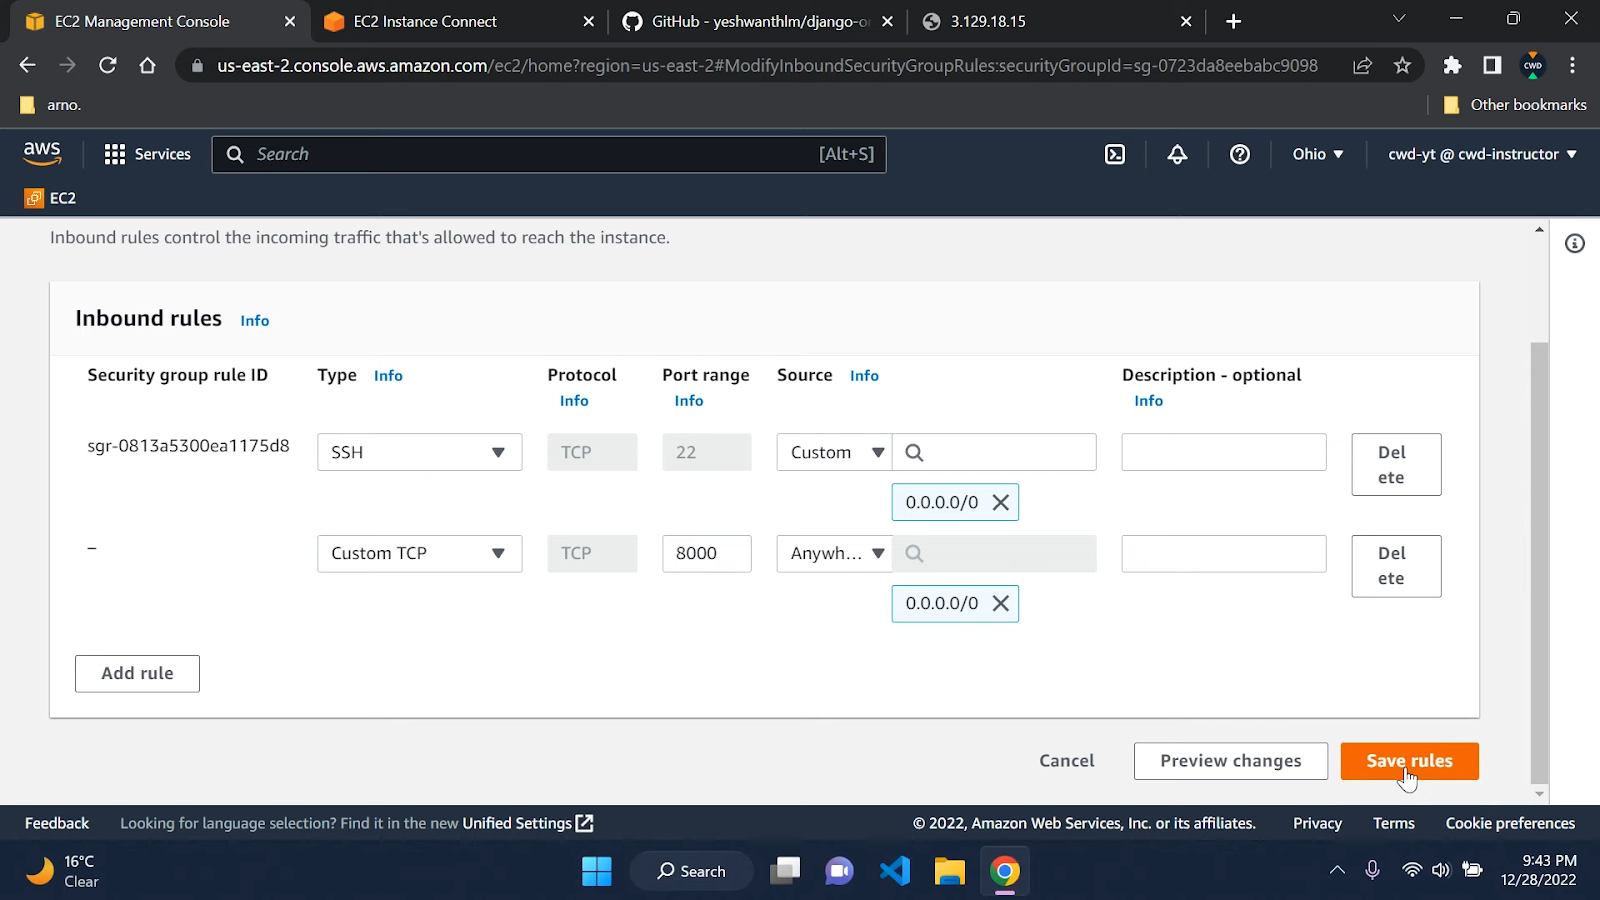
Step 3: Set a custom TCP inbound rule from the security group settings of your instance. Enter 8000 as the Port range.
Frequently Asked Questions
Can we deploy a Django project on AWS for free?
The short answer is yes. AWS free tier lets you deploy and host your Django project for free without custom DNS. But using a custom DNS will cost you $5.
Where can I host Django for free?
Free Django hosting is available on cloud platforms such as Vultr, AWS free tier, and Google Cloud.
Conclusion
We hope the above guide helped you deploy your Django project on AWS EC2. Though this is one of the easiest methods out there, it is definitely not the only one. And if you could find a way to simplify the process even further, don’t forget to comment below and help the Django community. Happy Coding!