How to Deploy on Amazon EC2 With Vagrant | a Step-By-Step Guide
We already know that the Amazon Elastic Compute Cloud (EC2) is a widely used cloud computing service that offers scalable and flexible virtual server resources. But do you know how to deploy on Amazon EC2 with Vagrant?
While deploying on Amazon EC2 traditionally, it requires manual configuration and setup. You can streamline this process by automating the provisioning and deployment of EC2 instances using Vagrant.
In this article, we will guide you through the steps of deploying on Amazon EC2 using Vagrant to enhance your development workflow. Let’s get started!
Why Do I Want Vagrant?
Vagrant is a really powerful tool for managing virtual machines. If you’re a developer it can make it push-button simple to setup a dev box on your laptop. It manages the images and uses configuration files to describe the specifics of your machines.
In the Amazon environment, you can deploy machines just as easily as on your desktop. That’s pretty exciting for those of us already familiar with Vagrant. With that, I’ve provided a simple 7-step how-to for doing just that!
How to Deploy on Amazon EC2 with Vagrant
The deployment process on Amazon EC2 is quite a simple process especially when you’re using Vagrant. So, if you are deploying it with Vagrant, first of all, you need to install the plugin. Here are the steps to follow:
Step 1: Use the Mac OS X Installer
Fetch your download file here:
- Vagrant Installer Downloads
- Run the installer. It should do the right thing!
Step 2: Install the Vagrant-aws Plugin
Run the following code to install the vagrant-aws plugin:
$ vagrant plugin install vagrant-awsStep 3: Fetch a Vagrant Box Image
Box images vary depending on your “provider” which is vagrant-speak for the environment you’re running in. For aws, they’re some simple json files that tell Vagrant how to work in that environment.
The creator of the plugin has provided a dummy box. Let’s fetch it:
$ vagrant box add dummy https://github.com/mitchellh/vagrant-aws/raw/master/dummy.boxThis command is straight out of the readme. What does it do? Take a look:
$ cd /var/root/.vagrant.d/boxes/dummy/aws$ cat metadata.json
{
"provider": "aws"
}There’s also the info.json file which looks like this:
$ cat info.json
{"url":"https://github.com/mitchellh/vagrant-aws/raw/master/dummy.box","downloaded_at":"2014-01-14 17:42:33 UTC"}
There’s not a whole lot going on here. If you’re deploying VirtualBox VMs with Vagrant, you’d see a VMware4 disk image. But with Amazon, it stores its own AMIs on S3, so Vagrant simply fetches them and runs them for you.
Step 4: Configure Vagrantfile
Create a directory to hold your vagrant metadata. This would be the name of your machine:
$ cd /var/root
$ mkdir testaws
$ cd testaws
$ vagrant initEdit the file as follows:
Vagrant.configure("2") do |config|
# config.vm.box = "sean"config.vm.provider :aws do |aws, override|
aws.access_key_id = "AAAAIIIIYYYY4444AAAA”
aws.secret_access_key = "c344441LooLLU322223526IabcdeQL12E34At3mm”
aws.keypair_name = "iheavy"aws.ami = "ami-7747d01e"override.ssh.username = "ubuntu"
override.ssh.private_key_path = "/var/root/iheavy_aws/pk-XHHHHHMMMAABPEDEFGHOAOJH1QBH5324.pem"
end
end
If you’re familiar with the Amazon command line tools, you’ve probably setup environment variables. Otherwise, these may not be familiar to you, so let’s go through them:
Your access_key_id and secret_access_key are two pieces of information Amazon uses to identify your instances and bill you. Those are unique to your environment so keep them close to the vest. Here’s how you create them or find them on your aws dashboard.
The keypair_name is your personal SSH key. You may have one on your laptop which you use to access other servers. If so, you can upload it to the Amazon environment. If not, you can also use the dashboard to create your own.
Whenever you spin up a server, you can instruct Amazon to drop that key on the box in the right place. Then you’ll have secure command line access to the box, without a password. Great for automation!
Next is your AMI. This is an important choice, as it determines the OS of the machine you’ll spin up, and many other characteristics. You can go with an Amazon Linux AMI but I quite like the Alestic ones from Eric Hammond. Trusted & reliable.
Looking for an Ubuntu AMI? Try this ami locator tool.
Step 5: Startup the box
Starting an instance once you’ve configured your Vagrantfile is pretty straightforward.
$ vagrant up —-provider=awsStep 6: Verify in the Amazon dashboard
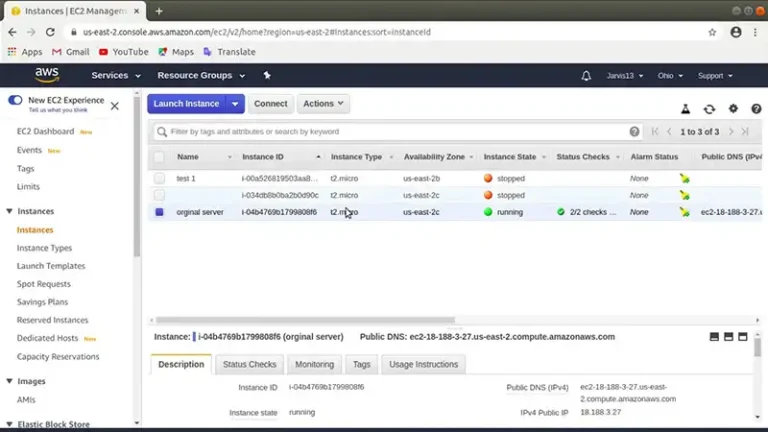
Jump over to your Amazon dashboard with this link. If you’re logged in already, that will take you to your EC2 instances. You should see a new one, based on the parameters in your Vagrantfile.
Step 7: Login to your Amazon instance
Last but not least, you’ll want to login. Note I’m explicitly specifying my SSH key here. Your path may vary…
| $ ssh -i ./iheavy.pem [email protected] |
Frequently Asked Questions (FAQs)
Can I Use Vagrant With AWS?
Yes, you can use Vagrant with AWS. The Vagrantfile contains credentials for the AWS AMI configuration. Using this, the Vagrant can launch AWS easily. You can find the newly created instance in the AWS console panel.
How Do I Deploy on Amazon EC2?
To deploy on Amazon EC2, you need to define the deployment first. Then configure the engine, EC2 Autoscaling group, and EC2 SSH Access. Finally, share, review, and launch the deployment.
How Do I Start A VM With Vagrant?
To create a VM with Vagrant, you need to start creating a VM first. For that, create a directory on your host for sharing files between your host and VM. Then, get a host shell and change the directory with the Vagrantfile. Finally, log into your VM from your host shell and then reboot your VM.
Conclusion
Whether you’re working on a small project or a large-scale application, using Vagrant to deploy on EC2 can boost the deployment process. All the straightforward steps to deploy on Amazon EC2 with Vagrant are provided in this guide and we hope, now you can significantly enhance your development workflow after reading this. For further assistance, don’t hesitate to contact us in the comment section below. Thanks for Reading!

