Restore SQL Database to Different Server | How to Do That
Data restoration incorporates copying backup data from mass storage and restoring data to its unique or new location.
Successful database organization in the world of data administration depends on the capacity to restore an SQL database to another server. This procedure is fundamental for effectively moving databases between servers, guaranteeing data integrity, and engaging processes to run continuously in a variety of computer settings.
In this article, we will explore the precise methods that control this process.
How to Restore SQL Database to Different Server?
Restoring an SQL database to a diverse server includes a few steps to ensure a successful exchange of the database and its related information. Here’s a general direction to assist you through the method:
Backup the Source Database
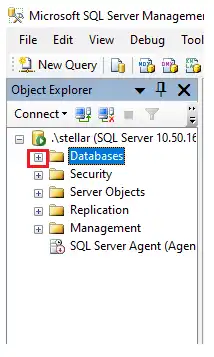
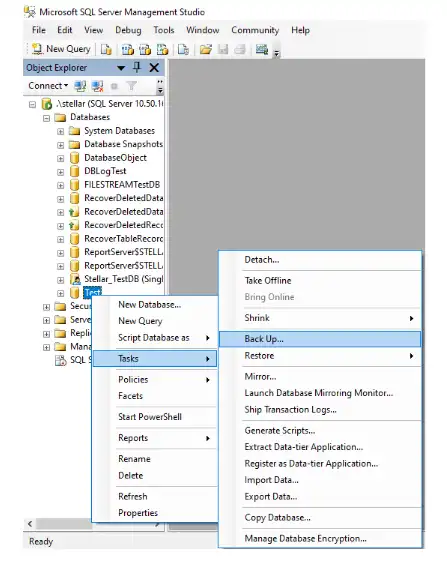
1. Launch SQL Server Management Studio (SSMS) and establish a connection to the old SQL Server instance (in our example, SQL Server 2008 R2). Expand Databases in the Object Explorer pane after connecting to the server.
2. Right-click the database you need to back up, and after that click on Tasks > Back Up.
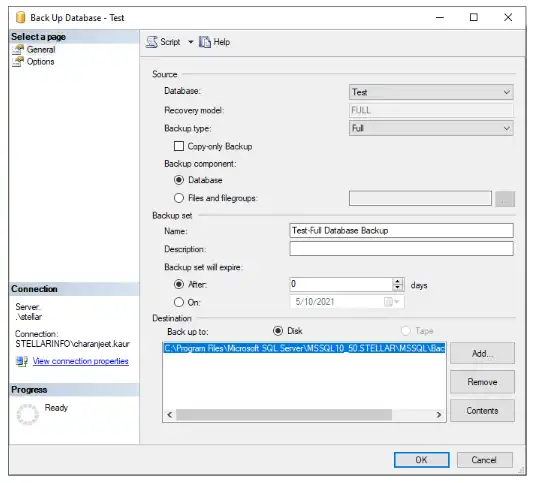
3. In the ‘Back Up Database’ window, select the Backup type: as ‘Full’, and then hit OK.
4. When a dialog box with the message “The backup of database ‘Test’ completed successfully” shows up, click OK.

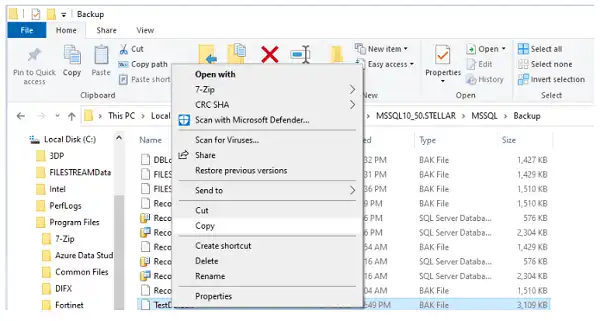
5. Go to the location where the database backup is stored right now.
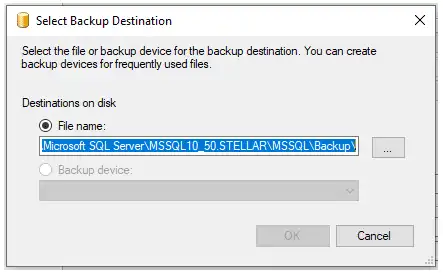
The default location of the backup directory is ‘C:\Program Files\Microsoft SQL Server\MSSQL. n\MSSQL\Backup’. If you can’t find the backup directory, right-click on the database, select Tasks, and after that click on Back Up to copy the location of the backup file.
Click the Add button in the Destination section of the backup database window. As appears in the picture below, copy the location of the backup file.
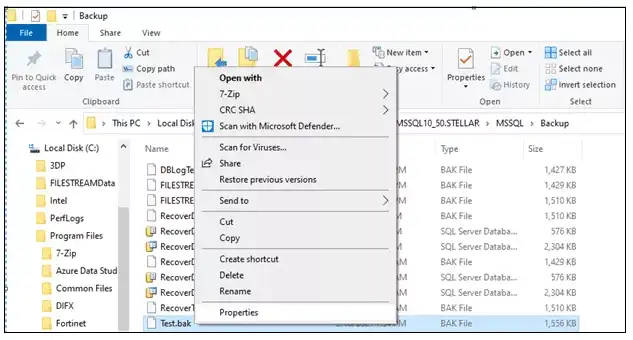
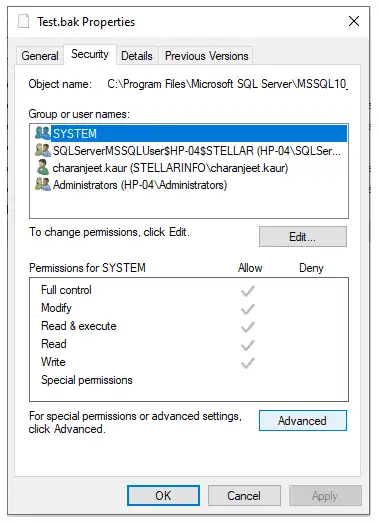
6. Once the backup file is located, i.e. Test.bak, right-click on it and select Properties.
7. Select the Security tab in the Test.bak Properties dialog box, then select the Advanced button.
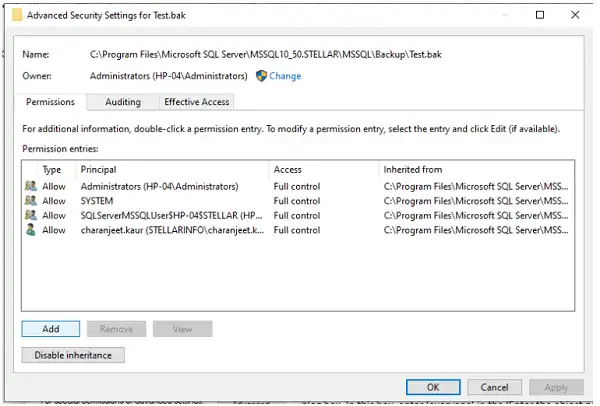
8. You must modify the permission configuration in the ‘Advanced Security Settings’ dialog box. To do this, choose Add from the menu.
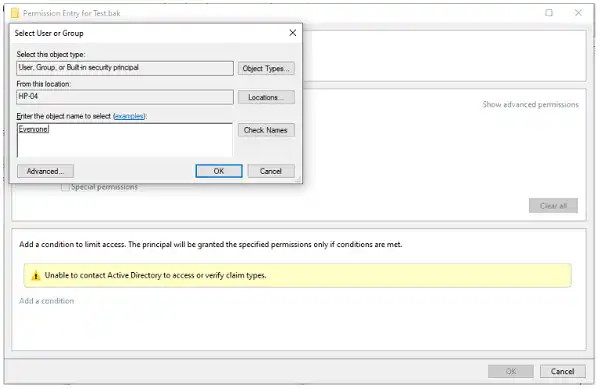
9. You must set the permission to everyone. Click the ‘Select a Principal’ option to do this. The ‘Select User or Group’ dialog box will appear as a result. Enter Everyone in the ‘Enter the object name to select’ section of this box. Verify Names and click OK.
10. Give full control to users to access the file and hit OK.
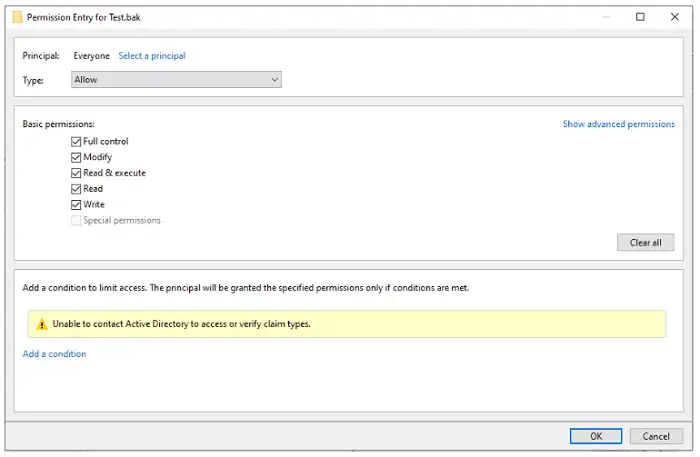
11. Select Apply and then click OK.
12. Reopen SSMS and take the previously backed-up database offline.
Copy the Backup File
1. Open SSMS and establish a connection to another SQL Server instance from where you need to restore the backed-up database copy of the old server.
2. Create the database you want to restore with the same title. In our example, we’ve made a database called ‘Test’.
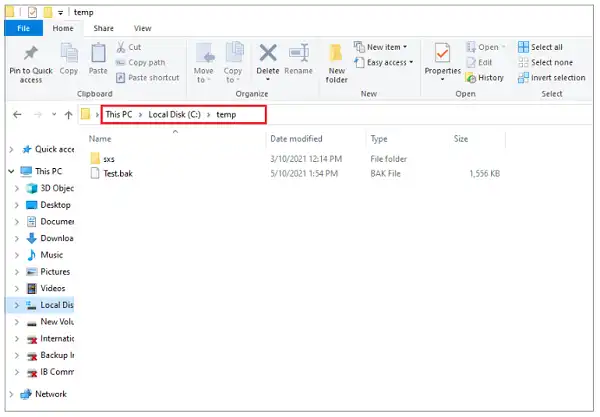
3. Go back to the original location of the backup file and copy the ‘Test.bak’ file.
4. Paste the copied backup file into a temporary directory on your Windows Server 2012 framework (or any other Windows Server version you expected to utilize for the database restoration).
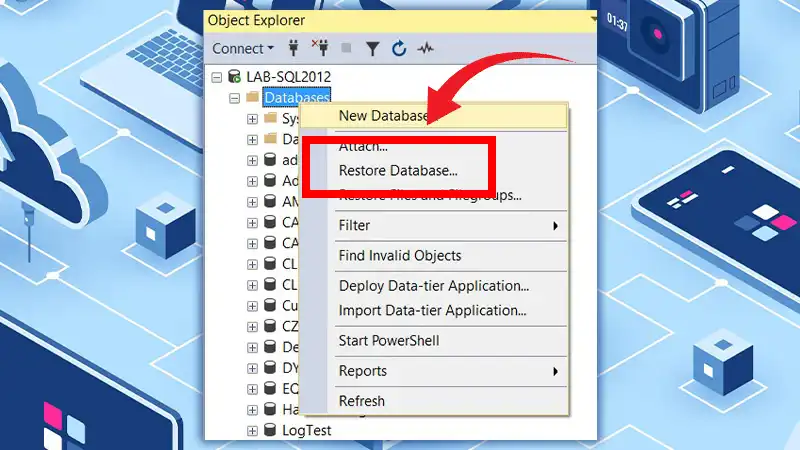
Restore the Database on the Destination Server
1. Right-click on the Test database, and after that choose Tasks > Restore > Database.
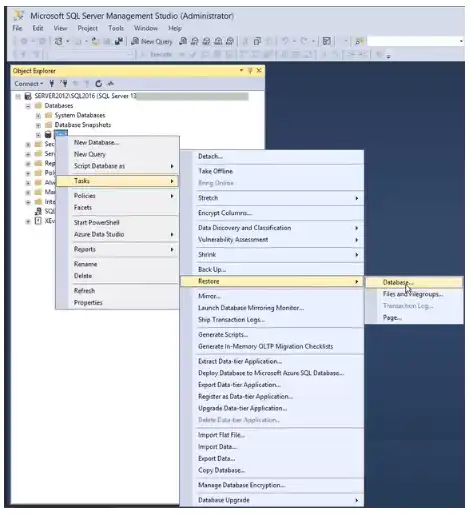
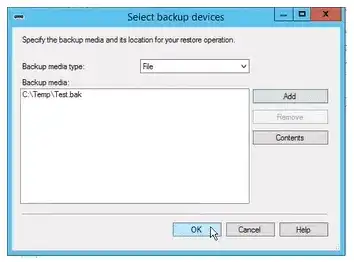
2. Click the button with 3 dots in the ‘Restore Database’ window. Click Add when the ‘Select backup devices’ dialog box shows up.
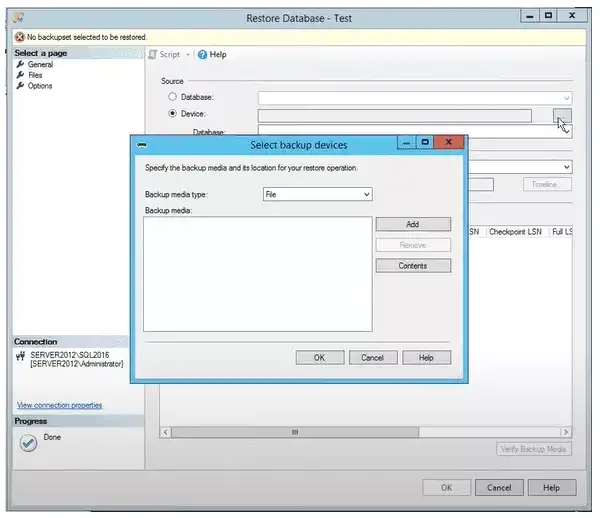
3. Choose the backup file you wish to restore in the ‘Locate Backup File’ dialog box, then click OK.

4. Click the OK button again.
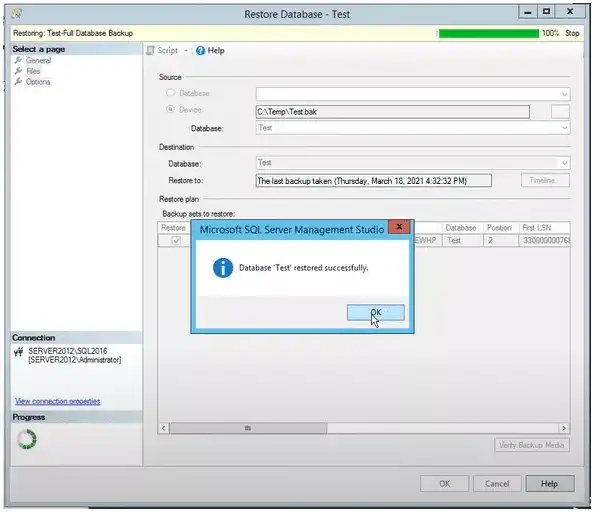
5. The ‘Test.bak’ file will be included in the ‘Restore Database’ window. Click OK.

6. Now, a message box, ‘Database restored successfully’ will appear, then hit OK.
The database backup you have taken in one SQL Server instance will be restored in the target server instance when you complete these procedures.
Testing
Test the database on the new server completely when the restore is finished to make sure that all the information and functions were effectively moved. Check the functionality of queries, stored methods, and other database objects.
FAQs (Frequently Asked Questions and Answers)
Can I choose which parts of the database to restore?
Yes, you can restore the whole database or particular filegroups, depending on your needs and preferences.
Why would I need to restore an SQL database to a different server?
Restoring SQL database to a different server is needed for a variety of reasons, such as server upgrades, disaster recovery, movement, or setting up a new environment, a development/testing copy can be made.
Can I restore a database from a higher SQL Server version to a lower one?
You normally cannot restore a database from a higher version to a lower one due to compatibility issues. Some systems do offer ways to migrate information between versions.
Conclusion
A basic component of productive data administration is to restore a SQL database to a distinctive server. Preparation, transfer, and approval are the three categories into which the processes are divided, permitting a consistent transition that maintains data integrity throughout the relocation.