How to Backup Azure SQL Database (Steps Guide)
If you want to back up your Azure SQL database to a local machine, you can do it directly from your Azure Portal. This method requires you to follow only five simple steps. If you follow them accordingly, you should have your Azure SQL DB backed up in no time.
However, the process varies if you want to back up your Azure SQL database to Azure blob storage. In that case, you have to create a storage account in Azure before configuring the backup.
How Do I Backup My Azure SQL Database?
Here’s how you can back up your Azure SQL database using the Microsoft Azure Portal.
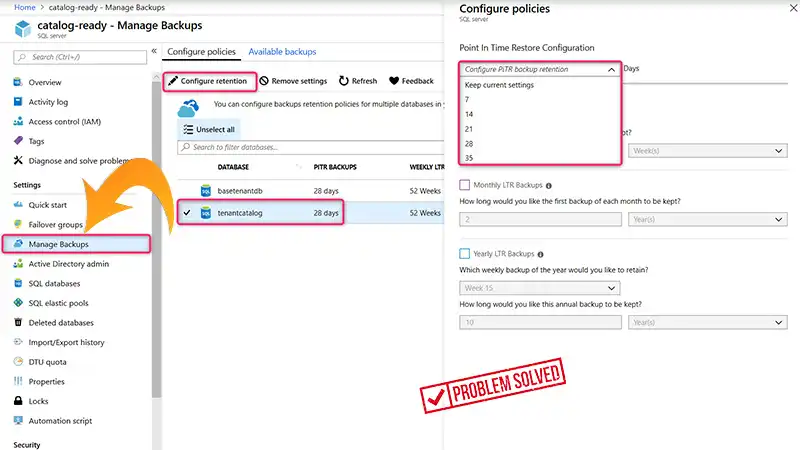
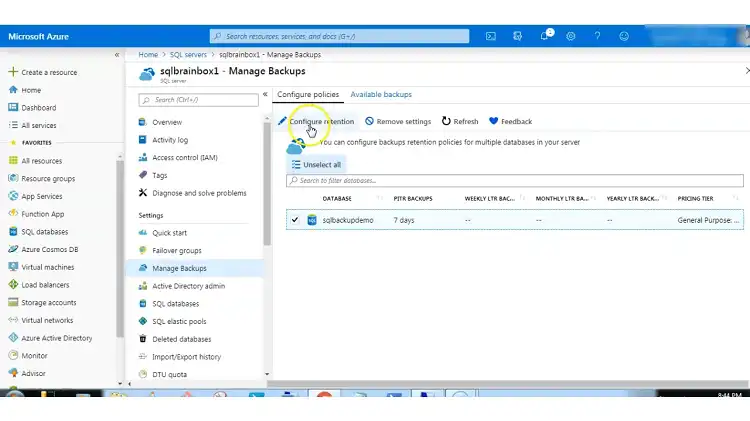
1. First, sign into your Azure Portal account and head over to the SQL Servers section. Choose your server and click on Manage Backups.
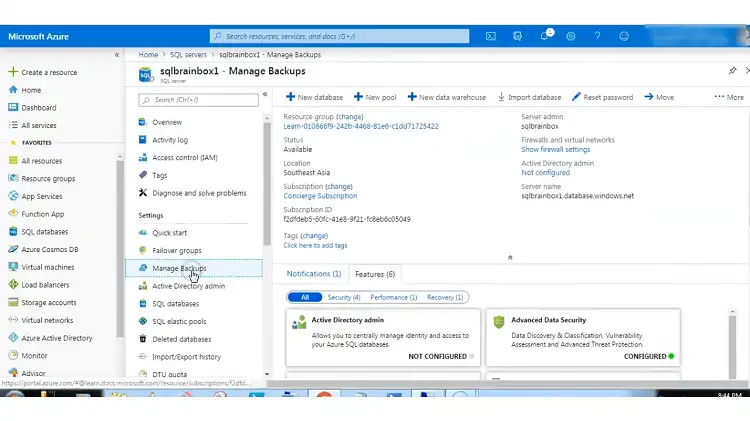
2. Select the SQL database you want to backup.

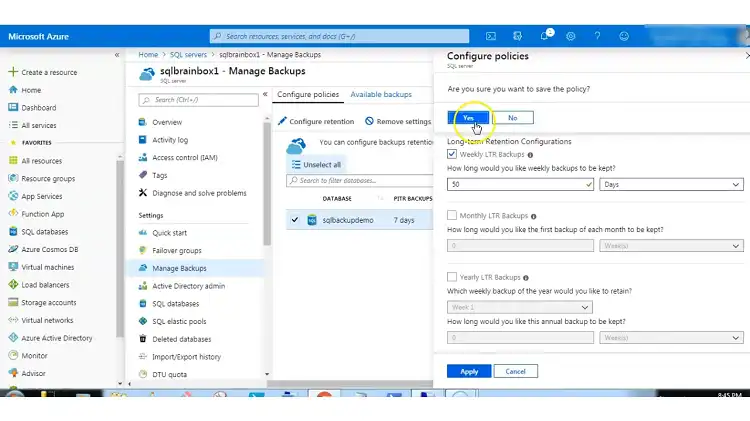
3. Click on the Configure retention option and fill in the form as per your requirements.
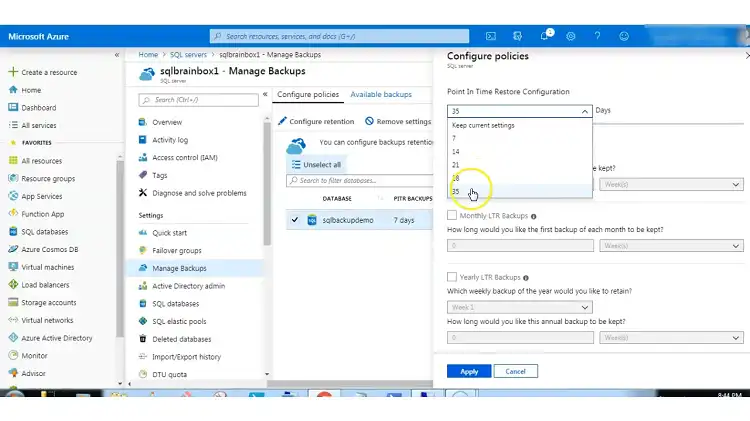
4. For Point in Time Restore Configuration, expand the dropdown menu and choose the number of days.
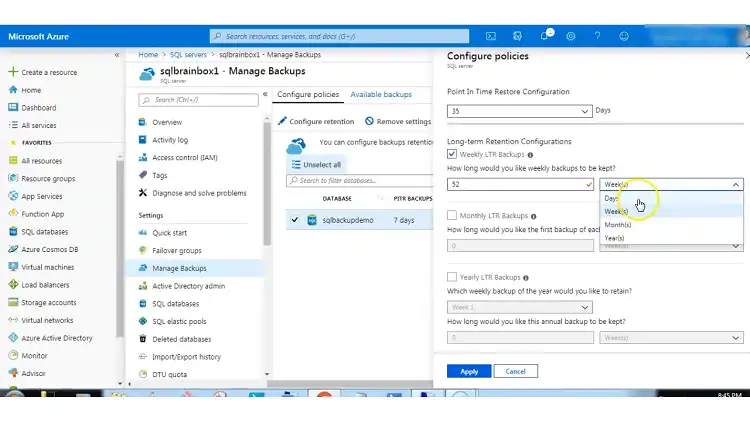
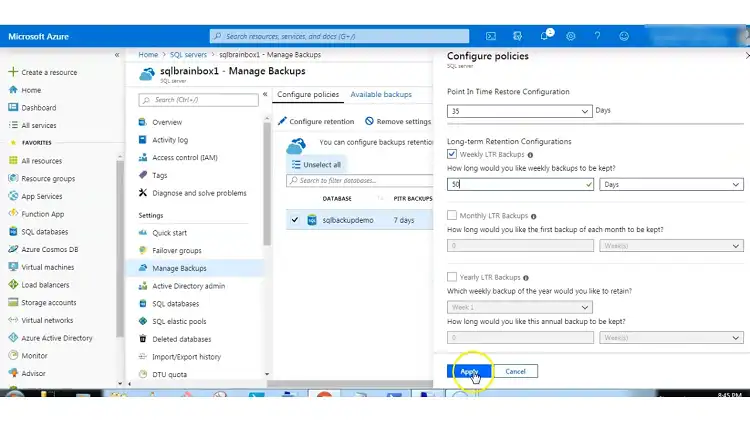
5. You can configure the Long-term Retention as Weekly LTR Backups and specify the number od days or weeks you want the weekly backups to be kept.
To save the policy, click Apply and confirm your choice.
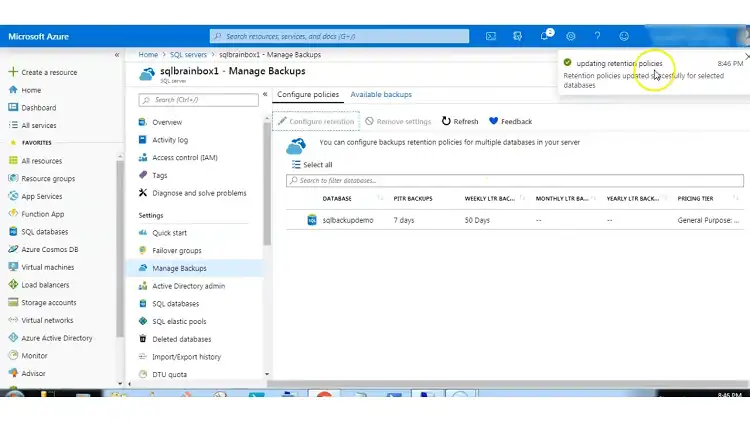
A message should appear that says “Retention policies updated successfully for selected databases”. It means the backup configuration has been applied to your SQL database.
How to Backup Azure SQL Database to Azure Blob Storage
There are 2 steps to backup an Azure SQL database to Azure Blob Storage.
Step 1: Create a Storage Account in Azure
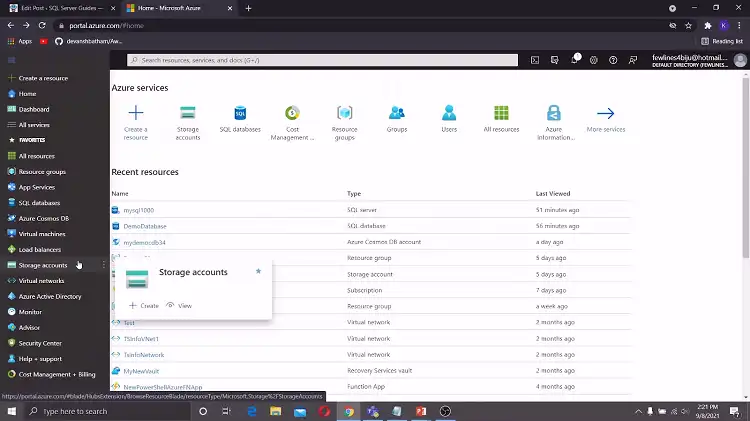
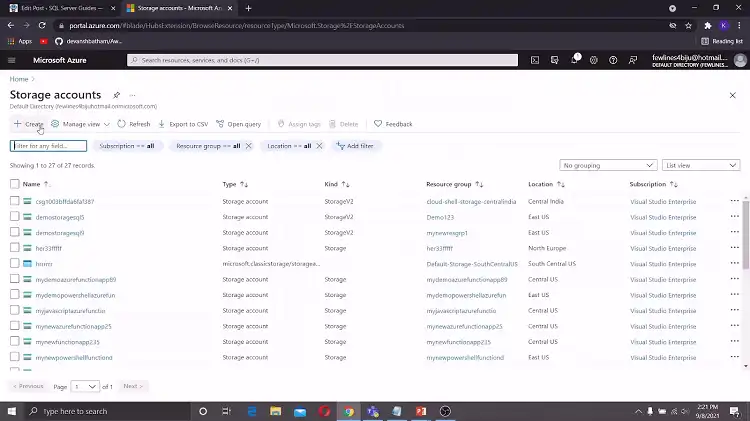
Log into Azure Portal using your Azure account credentials. From the navigation panel on the side of your dashboard, choose Storage accounts.
Click on Create. Choose your preferred options for Subscription and Resource Group.
Add a name for your storage account and pick your appropriate performance type. It will be in Standard mode by default.
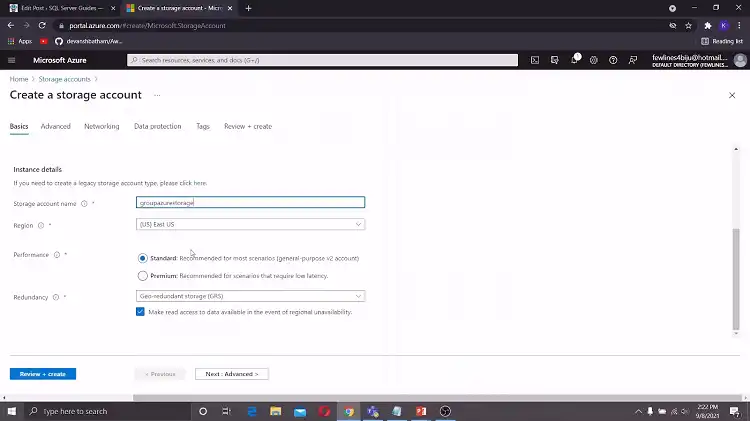
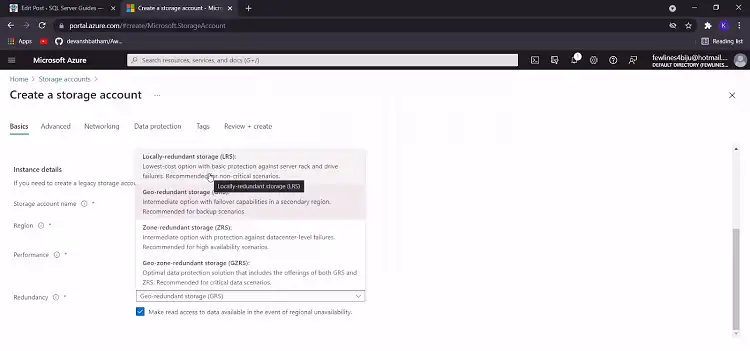
Choose Locally-redundant storage (LRS) from the redundancy options and hit the Next button.
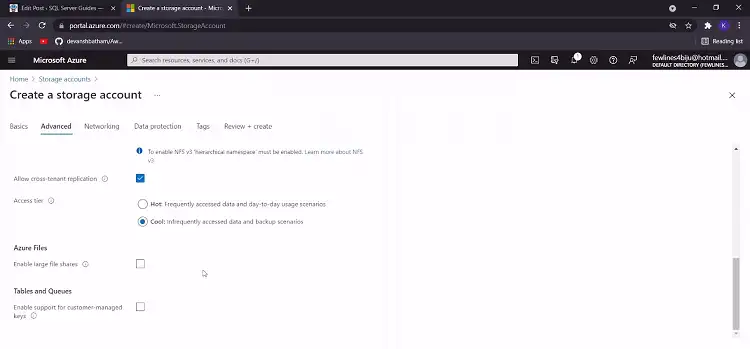
From the Advanced tab, select Cool for the Access tier, since you want to use it for backup.
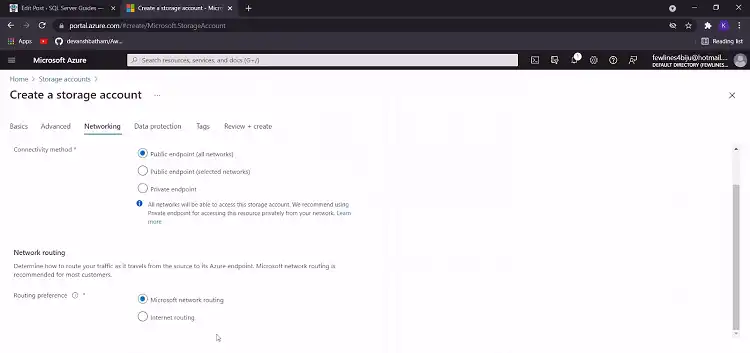
Click Next and choose your preferred connectivity method and type of network routing from the Networking tab.
Again, click Next and you’ll be redirected to the Data Protection tab, where you can enable security features that you find necessary.
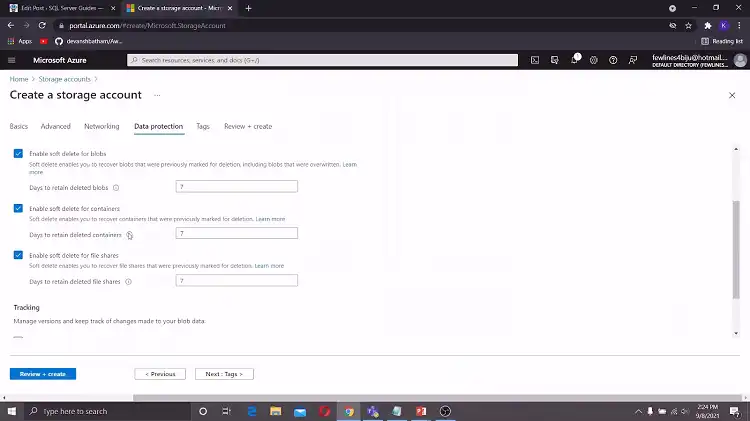
After that, choose Next and add tags if necessary.
Click Next for one last time and review the account configurations. Lastly, choose Create and wait until the process is complete.
Step 2: Backup the SQL Database to the Blob Container
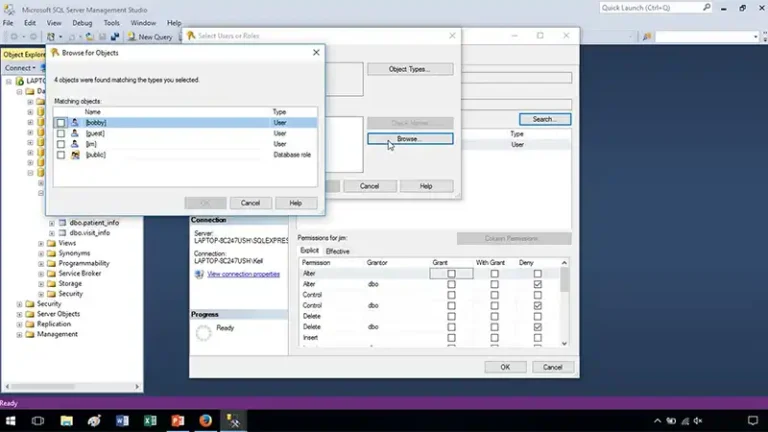
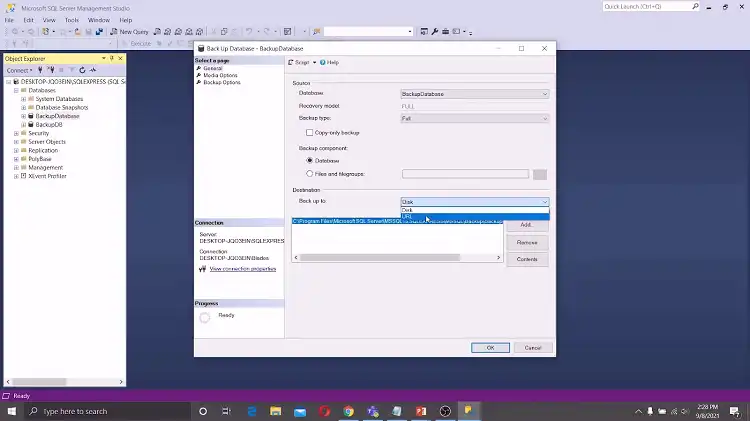
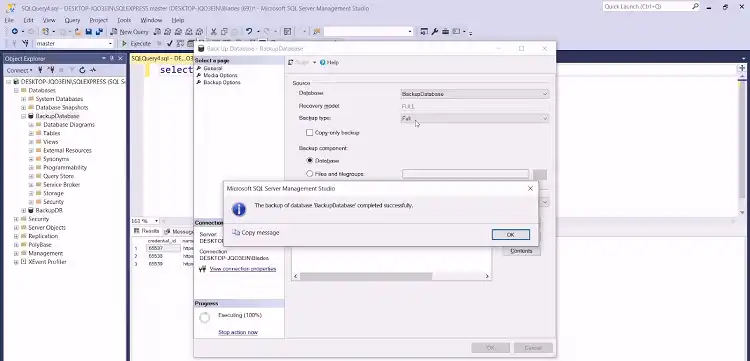
Open the SQL Server Management Studio and go to BackupDatabase > Tasks > Back Up.

Change the Destination to URL and click on Add.
Choose New Container from the popup window and sign in to your Azure account. Select the storage account you just created.
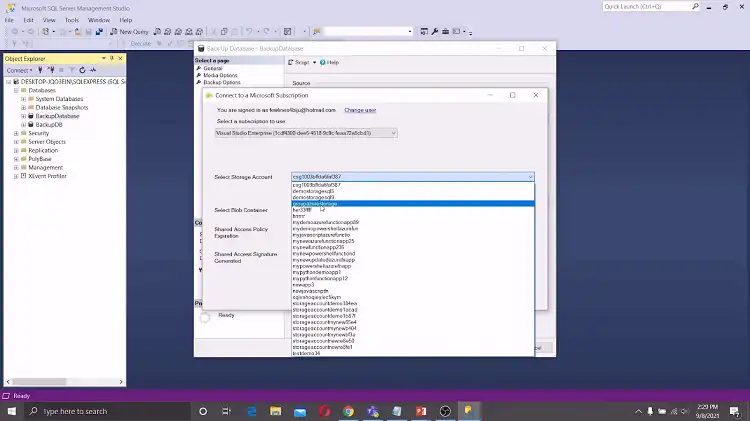
Select the Blob container, click Create Credential, and hit OK twice. There should be an URL now. Click on OK to finish the process.
Conclusion
Before you can back up your Azure SQL database, we recommend having an Azure Subscription, Azure Storage Account, and SQL Server Management Studio on your device. However, if you don’t have an Azure Subscription, you can get the job done with an Azure Free Account.